Wednesday, August 31, 2022

Iz'Garok the Traitor, 15mm Fantastic Battles

 I haven't gamed in a while due to moving house, decorating some of the new house and also going on holiday. Happily today we returned to gaming with a 1,200 point game of 15mm Fantastic Battles. Ian's Undead would take on the combined might of Phil's Orcs and my Barbarians. As we like to have a bit of story in our games here is the scenario I came up with...

Iz'Garok the Traitor

Revenge can be bitter sweet but Orc Lord Baarn Dur has sworn a most dire revenge against Iz'Garok the Traitor. Iz'Garok betrayed Baarn Dur and now it seems his days are numbered. Fleeing into the Wylde Iz'Garok is now being hunted down by the Orcs and their new Barbarian allies.

The Wylde is currently under the domain of the Dread Lord who commands an undead army who reacted instantly and now the two forces face each other across a soon to be battlefield with Iz'Garok caught hiding between the two armies.

Will Iz'Garok be safe if he reaches the Undead army or will he be caught by the orcs or their allies. Once the terrain for the game has been decided upon but before deciding who is attacker/defender players take it in turns to place 6 counters, outside deployment zones but at least 3BW apart. These counters represent possible hiding places for Iz'Garok. As units contact/move over the counters they may throw 1xd6 to see if they may have found Iz'Garok, needing a 6 on any counter. If Iz'Garok has not been found when the last counter is moved onto then that is his hiding place. Immediately throw another d6 to see how Iz'Garok reacts...


Orcs/Barbarians

Undead

1,2: kill Iz'Garok straightway

1,2: kill him, no-one likes Traitors

3,4: take Iz'Garok to Lord Baarn Dur

3,4: Hold him captive

5,6: Iz'Garok escapes and flees 4bW towards the undead forces treated like and acting as a Rogue.

5,6: Enlist him as a rogue in your army.

Decide Attacker/Defender as usual and let battle commence.Ian and his Undead were the  attacker leaving Phil and I to defend. Deployment was as in the photo below (Undead on the right). Mishaps led to one company of skellies running away and a few other units on both sides either being late or a bit enthusiastic.  

Turn 1, Phil's archers move into the wood, find a counter and throw a six. They find the traitor and decide to kill him. (that was my carefully thought out scenario over and done with, ah well, on with the main battle!) Note: my trees are still packed in a box so we just used a few mdf bases to represent woods-we decided it must be Autumn! 


Next photo shows Ian's new Undead Chariots (Kallistra).
 True to the rule of the newly painted these were fairly useless today. 


An over view of most of Ian's Undead, a lovely looking army with themed bases. Ian has made the outer edge grass green but scorched and black in the centre. Looks very effective. They might look good but how well could they fight? 


Ermantrude the giant undead cow advances towards the Barbarians. 


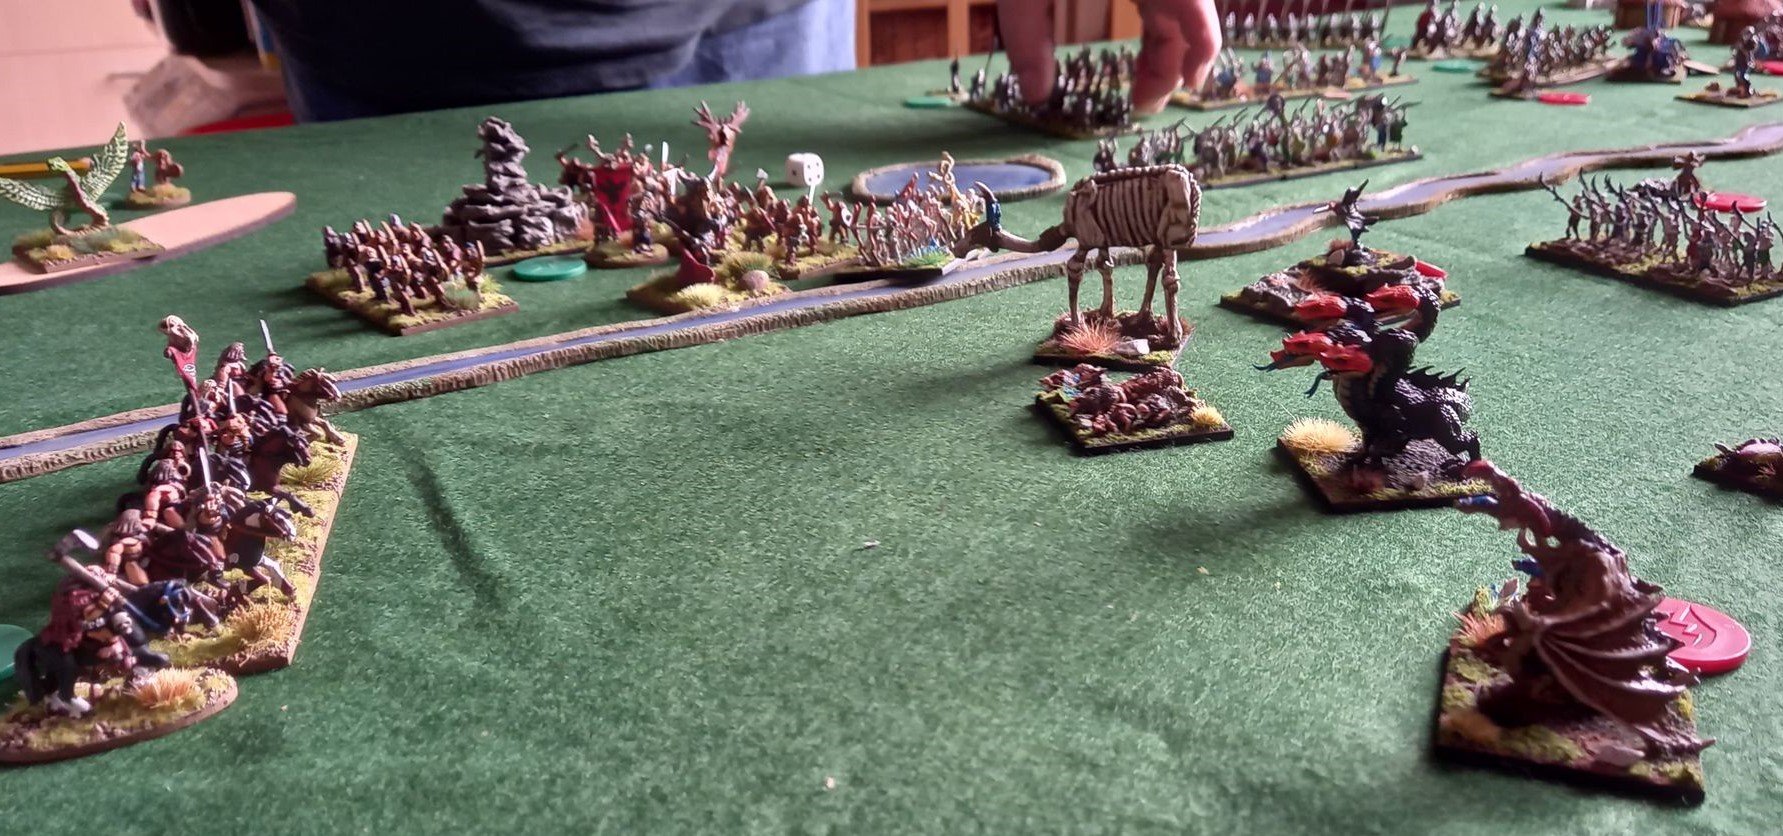
The Barbarian sworn cavalry work their way round the undead giant but the Undead Mage-Lord Koogerand Hymax has been busy summoning an undead dragon and a hydra. In the background you can just see the Wyvern summoned by the Barbarian mage Talorcan. 


The Hydra is a lovely 3-D printed model that Ian got from Ebay.
 Being newly painted, in melee it last just one turn!


On the other flank Ian was trying to work his way around Phil's Orcs by going through the settlement. . 


Phil had taken up a good defensive position that did not allow the Undead to make the most of their more numerous units. 

Phil's newly painted Orc Boar riders (Alternative Armies) battled well all game, so maybe that theory of new units being rubbish in their first game only works for Undead units. 

The Mighty Thor, also in his first game performed very well. Using Barrage (to represent his throwing hammer) he only ever missed with one dice. Once in Melee with Ermantrude the giant Undead Cow Thor was the easy winner. Thanks here to the author of the rules Nic, for suggesting the stats for Thor, they worked really well.  

On our left flank there was a massive battle between Phil's Orcs and lots of undead. Some of the melee's lasted 3 turns but the Phil's fearsome Orcs prevailed.  

Having patiently waited for the right moment the Barbarian Sworn warriors helped by some Bearserkers make mincemeat of the Undead Dragon. 
At this point the undead horde collapsed. In the photo below you can see the undead characters fleeing from the table pursued by the Mighty Thor! 


Overall it was a resounding victory for the Orc/Barbarian alliance. The battle was finely balanced by turn 3 and looked like it could go anyway. At the end of turn 6 the Undead were almost completely destroyed. It would seem that their superior numbers  were not enough against a tougher, better armoured opponent. 
Once again, we all had great fun using the Fantastic Battle rules so we decided to play again next week. 

Thursday, July 14, 2022

Clash on the River Meirr-Fantastic battles in 15mm

 Today's game of Fantastic Battles saw Phil's Orcs take on the combined might if Ian's gnomes and my barbarians. The scenario was a battle for possession of a bridge as detailed below...

Having seen the error of their ways, the Gnome forces of Nature have forsaken the Orcs and  are now allied with the Barbarians led by the fearsome Wulfnoth. The Orcs led by the mighty Baar'N Dor are now advancing towards the bridge over the River Meirr, can the Barbarians and Gnomes keep control of the bridge before too many Orcs cross over to the western lands? 

Clash on the River Meirr.

1200 points of Orcs against 600 points of Barbarians and 600 points of Gnomes.

Objective: to defeat the enemy and be in control of the bridge. Roll a d6 as normal to decide who is attacker and who is the defender.

Each side has to deploy 1xd6 of units on the west side of the river, the rest of their force will deploy as usual over on the eastern side.

Terrain: as per map below with a few extra terrain features. The defender places the extra terrain, the attacker chooses which table edge to deploy on.

Camps: Each army has a camp (treat as rough ground) which must be deployed on the eastern side of the river in the appropriate deployment zone. If one side raids or captures the enemy camp, it causes a ripple of resolve loss (same as losing your Warlord, so -1 resolve per unit.)


The dice decided that Phil's Orcs should deploy first, along the southern edge with just the one unit on the western side. The Orcs suffered no 'mishaps'. That meant the Barbarians and Gnomes deployed along the Northern border and they also had just one unit deployed west of the river. In the 'Mishaps' phase quite a few of Ian's units had to move forward or backward, messing up his plans for that flank. 

Here you can see Phil's fearsome Orc army, large units of archers and large units of warriors backed up by Trolls and their base (hut) to the rear.
 (I seem to have lost my photo of the allies deployment). 

In last weeks game I never got chance to use my cavalry with their fearsome charge so this week it was straight into the orcs on turn 2. Three turns of fierce fighting later both units broke. We had an interesting discussion here when my cavalry had taken their full amount of resolve in damage but were kept in place by the single resolve of the captain with them (Brave Bodvoc, the Warcrow himself!). When activated could Bodvoc remove himself from the melee (basically save his skin) and then both units would  fight even though the cavalry had no resolve left? Couldn't quite find an answer in the book but we decided the captain needed to use his Resolve to keep them in place? 

My single company of scouts had been deployed on the West side of the river but did not fancy their chances against the large unit of orc archers peeking out from behind the bridge. So my scouts fled across the river, grateful that there were no trolls under the bridge.

In response, Phil activated his orc archers into column and they set off over the bridge to try and join the fray (but proved to be too late). 

Overview of the battle where you can spot Ian's mad mushroom berserkers. Their stimulants made them Impetuous resulting in them moving back and forth randomly and never getting into action-a tough unit sadly not used in the battle. 

The Barbarian chariot supported by Viking warriors edge towards the trolls which had been badly mauled by shooting from Ian's flying witches. 

CHARGE! It was a tough fight but the Trolls were routed and the warriors scattered too.

Right on the Eastern flank the Gnome Imps charged into another large unit of Orcs and just managed to survive whilst scattering the Orcs. Victory for the Gnome and Barbarian alliance. 
Interestingly neither side tried to capture the enemy camps during the game but the allies did use more single company units than before and their extra manoeuvrability seemed to pay off.  Phil's large units were tough but slow to react and do anything other than move straight ahead.
Another great game that once again came up with unexpected outcomes and also proved that we can defeat the dreaded Orcs!  I just did not take enough photo's of this game. 

Friday, July 8, 2022

Fantastic Battles LOTR and some fighting Robots

 Great fun today, driving down to Chris's house for a couple of games. First up we played Fantastic Battles with our 10mm LOTR figures from Copplestone Castings. Borrowing one of the scenario's from the author (Nic Wright) who recently released a pdf of siege rules and scenario's Chris set the scene for our Orc and Rohan forces as follows...

“LET ROHAN LOOK TO ITS HORSES”

Following the recent discomfiture of the Nine, a raiding party has crossed the Anduin to steal valuable black horses. King Theoden is unwilling or unable to listen to warnings, and those who still have an eye to danger are looking west towards Isengard, not east to the river.

Never-the-less, a force is hastily raised and sent forth to try to prevent the thefts, and avenge whatever other foul deeds the evil raiders have perpetrated.

When they arrive in the Eastmarch they find burned farmsteads and slain farmhands and no horses at all of any colour. A few survivors are able to point the way the raiders went, though little help is needed to follow their foul path. More disturbing are the wild tales of a dark shadow of fear that accompanied the orcs…

The game uses the Reive and Retrieve scenario from the supplement (see below), with Rohan being the defender, and Mordor the attacker.

A raiding force from Mordor is attempting to acquire horses, especially black horses, from Rohan.

Army size

Both players recruit 660 point armies. In addition, Rohan starts the game with four to six (i.e. 1d3+3) herds of wild horses, each based as an individual company. (We used some bases of Romano British light cavalry i have to represent these.) 

Terrain

Set up a battlefield 20x20bw with one area terrain feature in each quarter of the table.

Deployment

The defender deploys their army within 5bw of their own table edge and no closer than 4bw of either side edge. The attacker then deploys their army within 4bw of their own table edge and no closer than 4bw of either side edge.

In this scenario, all companies must be deployed individually. Companies may not be formed into groups.

The wild horses are placed on the table by the defender after the attacker deploys. They may be placed anywhere between the two deployment zones, no closer than 3bw from the nearest company, and all facing towards the attacker’s table edge.

Special rules

Wild horses are unaffected by resolve and unless contacted by a herding company will make impetuous moves at the start of each of the defender’s action phases. Reroll any results of Over there! Wild horses have a base movement rate of 4bw.

A company belonging to either player is deemed to be herding wild horses, and therefore dispersed amongst them, when touching the wild horse base with both front corners. Once a company has started herding wild horses, they may not voluntarily cease.

The horses and company merge together as a two-company unit in column formation facing the direction of the company. They have a movement rate of 4bw or the movement of the company, whichever is slowest. They may not change formation or intentionally move into base contact with an enemy unit. All base edges of the herding-company column should be treated as flanks for the purposes of shooting and melee modifiers. Herding companies cannot shoot in the Shooting phase.

If the herding company loses sufficient Resolve to scatter, remove the company but leave the wild horses in place on the table.

Victory

The attacker must attempt to drive the wild horses off the table along their deployment edge. Any company that drives a herd off the table is also taken off the table. Such companies have not scattered and do not cause their friends to suffer loss of Resolve. The game lasts for five to ten turns (i.e. 1d6 +4) or until either army breaks. At the end of the last turn, the attacker receives 2 victory points for every wild horse base they have driven off the table whilst the defender receives 1 victory point for every wild horse base remaining on the table. The victor is the player with the most victory points.

Once deployment was complete we were quickly into each others troops and trying to grab the wild horses. I think the whole game lasted 4 turns. 

The rival forces deploy with the wild horses neatly lined up across the centre. 
Dice decided we had 4 bases of wild horses to herd to safety. 

The advance towards the horses. 


Chaos ensues as wild horses are gathered and battle is joined. 
We found that the companies in charge of wild horses were easy targets for being counter attacked by enemy companies as they are deemed to be in column as they try to control the horses and fight at the same time. A better ploy may have been to attack and destroy the enemy first then capture the horses? 

Four action packed turns saw both sides taken to over half of their companies as casualties. Rohan were exactly on their break total but the orcs were almost totally destroyed. Rohan also had control of two herds of the wild horses, the other two herds were still on board running around waiting to be captured so Rohan could claim a victory of sorts despite all the casualties. 
A fun scenario that gave us a very different game. 
I also enjoyed destroying a ringwraith on his fellbeast. 

Chris is also in on the game development of Nic's game of Mech warfare. Chris has started collecting many of the old Battletech plastic figures to play this game. We just had time to try a small game. The rules seem to work well and Chris certainly taught me a good lesson as he outmanoeuvred and out shot me. My luck on the dice also completely deserted me (try throwing 9 dice and getting no 5's or 6's, I managed it quite a few times!)
 Chris also generously gave me some models, a sly ploy to get me more involved no doubt but also very kind of him.
My thanks to Chris for another great day of gaming.   

Wednesday, July 6, 2022

Yrfog of 'The Bones' and the Temple of Doom-more 15mm Fantastic Battles.

 We are really enjoying our games of Fantastic Battles, so much so that we decided to play again this week, this time introducing my newly assembled 15mm Barbarian Army playing against a mix of Ian's wacky Gnomes and Phil's evil Orcs. Most of the barbarians are from the Mighty Armies boxed set, originally based for Dragon Rampant but just needed rebasing to suit Fantastic Battles with a few added Copplestone barbarians and some Vikings on loan from my Forged in Battle Viking army.  Astute readers may spot from the photo's below that even on their new bases most of these figures can still be used with Dragon Rampant too if I so wish. 

1,000 points (apart from the characters which I forgot to put in place). 

Copplestone Northlander Cavalry (or Elite Sworn Warriors in Fantastic Battles). 

Copplestone Characters, some painted a while ago, some newly done. 

Mercenary Ogres which are from the old DnD range of miniatures. 
Conan the Barbarian (my Rogue) from a company whose name I forget (but it may be the now sadly defunct Rank and File?). 

Fire Giant (make unknown) and Frost Giant from Alternative Armies, actually sold as a Fire Giant. 'Bearserkers' are a mix of Forged in Battle and Splintered Light Vikings and a Copplestone Bear.  

Stag drawn chariots from Mighty Armies/Rebel Miniatures

So, with the Barbarian's ready to play it was time to create a scenario. Would the Barbarians suffer the fate of all new armies as they approach...the Temple of Doom! 

Yrfog of 'the Bones' and the Temple of Doom

Terrain: player A sets up the terrain (keeping it fairly balanced and neutral) and place the temple in the centre of the board. Then player B chooses which side of the table they wish to deploy on, player A will deploy opposite, (rolling for Attacker and Defender as per usual rules on p19).

To counter the growing power of the Northern Barbarians, the Orcs and Gnomes have forged an unlikely alliance. As the two forces march towards battle one of them has captured the infamous (and very old and smelly) half-orc sorcerer, Yrfog of 'the bones', renowned for his collection of bones, bad temper and very effective curses. Yrfog was on his way to the ruins of the Temple of Doom to search for ancient artefacts and it is here that the two armies clash.

The two sides each throw a d6, highest score is the side that has captured Yrfog of 'the Bones'. The controlling player places Yrfog with either one of his units or characters.

At the start of each turn the controlling player throws a d6. On a score of 6, Yrfog is persuaded to join your cause and become an extra Mage character with a Level 3 Curse spell. However, if the player throws a 1, Yrfog escapes and immediately runs 4BW towards the nearest enemy unit or character and tries to ally himself with them.

It may be that from now on players have to fight for control of Yrfog, he can be captured if any character or unit he is with scatters or if a player can move into contact with the figure of Yrfog.

The Temple of Doom:

Any Character who reaches the very centre of the Temple of Doom finds a hidden cellar and may roll 1d6 in an attempt to retrieve any relic hidden there.

1-2: Character is slain by a hidden trap, remove the character from play immediately.

3-6: the character emerges with the relic, roll on the relic table on p18.

Note: there can only be one Relic.

So with the scene set, on with the battle. My 'Bear'serkers on Stimulants threw a 6 thus gaining Beserk and Proud and the dice also decided that Yrfog would be held prisoner by the Barbarians, so a good start for me. The deployment was as in the photo's below.  

The Orc and Gnome alliance deployment and their pesky dragon. Take note of the small gnome captain (Ro'Bin) by the dragon. This character had the new magic item the Phoenix Bow of Precision. During the game he managed to get off four shots at characters, needing a 6 to hit and managed to kill my rogue and a captain, well over the odds and points well spent for Ian.    

The Barbarian's deploy facing the Temple of Doom.  

Close up of Ian's dragon, a super Reaper Bones figure, ideal for a 15mm dragon. 

Deployment after mishaps had sent various units forwards. 

Ian's gnome allies, the flying witches corp and the berserk elks. 
Ian seems to excel at using flying units and these witches were a real pain in the Barbarian butt on my left flank. 

Phil has a really annoying unit of Orc archers that seem to do so well every game. Here they shoot my giant down who then falls on my 'Bear'serkers, not the best of starts now for the Barbarians. The orcs then shoot my 'Bear'serkers before they get chance to charge them. 

Ian's Elks charge into my Sworn Warrior cavalry for an epic scrap between these units. The Sworn warriors scraped the win, things are starting to look better for the Barbarians. 
It was around now in the game that Yrfog of the Bones decided to fight with my Barbarians. Yrfog successfully cursed the orc archers but then that damned Gnome Ro'Bin shot him! That was a  brief but action packed game for Yrfog. 
The orc Rogue also charged one of my Mages and they managed to kill each other-there was a high character death rate in this game. My other Mage, Talorcan managed to get into the temple and escape alive with the Titanic Diadem of Foresight. Talorcan also had the Blink spell which he used to great effect during the game. My archers used the blink spell to avoid the enemy trolls and managed to shoot them to pieces over a few turns. 

The Dragon tried to get behind me but moved too far and went out of command and his 'Impetuous' roll sent it charging into my Chariots who defeat it after two rounds of melee. 

Wulfnoth, my Warlord, finally catches up with Ro'bin the Gnome captain archer and gleefully pulls him to pieces. Boy but do I hate that gnome! 
Both sides are now just two companies away from their break point. 

Some people think it's all over...and it is as the 'empowered' Orc archers take down the Fire Giant who then falls onto them. Sadly for me the orcs also manage to defeat my Ogres who had recklessly charged them and kill my Warlord too. These Orcs must be men of the match? 
 I think I hate those Orc archers more than Ro'Bin the gnome.  
This was another great game and one of our closest fought yet. 
Guess what? We are going to play again next week. 


Wednesday, June 29, 2022

The Return of the Dead, 15mm Fantastic Battles

 Somewhere dark and dank the restless dead were stirring. From the deepest, scariest corner of Ian's painting shed the undead army appeared and marched over to Phil's house for their first game of Fantastic Battles. Facing these scary little blighters would be the combined might of Phil's Orcs (led by Lord Baarn Dur) and my Ice Elves (led by the Mage Lord Scathach Death-gaze). Ian also produced some suitably themed undead scenery to add to the atmosphere. We were quite interested in how this new army would play as it would be using Traits we had not played before like 'Mindless'.  All figures are 15mm from a wide range of companies. 

We came up with a simple scenario. 3 pieces of undead scenery were placed about the board serving as 3 objectives to claim.  The theme being the undead need them to raise more troops and the alliance needs to destroy them. 

Orcs and Ice Elves on the left were the attackers, Undead on the right were defending. 

Ian had lots of great previously unseen figures in his new army including these undead vultures from kallistra. 

Here you can see the undead mad cow and some of the scenery to be fought over. 

First main action of the game was my Ice Elf mounted crossbow being charged by the vultures. They remained in combat for about 5 turns before the elves finally won. 

The undead rogue was leading the vultures and he challenged the Ice Elf rogue to a duel and the two managed to slay each other. This left the two units out of command but locked in melee.

Love these skeleton cavalry from Ian. He used 'summoning' to bring these on. 

Phil's new unit of Trolls held our right flank all game, facing of against more undead cavalry and skeleton archers, neither of which dared advance against the Trolls. 

The Jester in the background is in fact Kroogerrand Hymax the Undead MageLord/Necromancer, he of the annoying summoning spell. Just as the alliance thought they were getting the upper hand, up popped a freshly summoned vulture, undead dragon or two companies of undead cavalry. 

Another very nice undead figure-that did nowt all game!

Ermantrude the Undead Mad Cow charges into my very worried Ice Elf archers. 

A view down the main centre battle where Phil's Orcs was slowly getting the upperhand. 

My Tiger Lancers having defeated one lot of undead suddenly find themselves charged by an undead dragon and a vulture. 

Ermantrude, the undead mad cow is slain by the Ice Elf Archers but falls onto them squishing a few brave elves. 

The centre of the battle as the Undead are broken leaving the Ice Elf/Orc alliance victorious.

Phil's main battle line a bit battered but still intact. 

Once again, Fantastic Battles gave us a great game that seemed incredibly close until the undead suddenly crumpled over two action packed turns. Victory to the Alliance but we are sure the undead, (currently sulking in Ian's shed) will return. Ian's use of the Summoning spell was very clever but none of us were quite sure on how it should actually be cast. His mainly Mindless army was quite tough to break and certainly presented us with a fresh challenge. 

We are enjoying Fantastic Battles so much we have decided to plan a small three player campaign, using the campaign system in the main rulebook with a few added tweaks of our own. It may take a few weeks to sort out but should be fun. 

I have also had time to paint up a couple more 10mm ACW buildings, a church from Timecast and the barn from Pendraken. The two ranges seem very compatible to me. The barn has an integral base, I added a small mdf base with a few cardboard graves to the church. 


Lion Rampant: the Taxman Cometh.

  For this week's game of Lion Rampant we chose 'the Taxman Cometh', scenario. Ian took control of two 16pt forces to contest th...