Tuesday, May 30, 2023

On Bloody Ground in 15mm second game.

 This weeks game was another 15mm Dark Age battle between my slowly growing Viking and Saxon/Anglo Dane forces using the new rule set 'On Bloody Ground' once again. Having enjoyed our first game last week we did have a few questions which happily the authors quickly answered via their Facebook page. So I slightly enlarged both sides (but I need to do a lot of painting for this project as we were still using a few 15mm Barbarians to represent a few of the units). 

Part of the Viking army, mainly Forged in Battle 15mm with a few Splintered Light characters. 

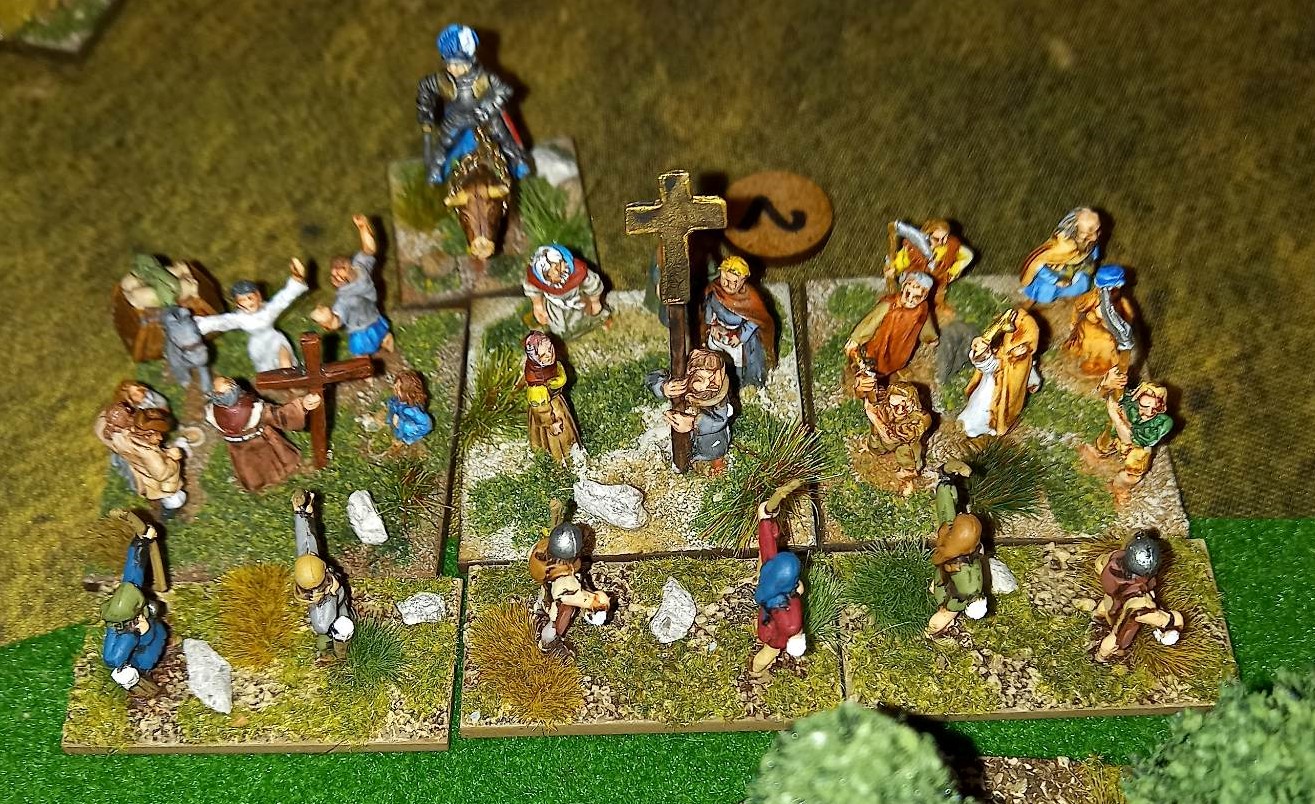
Some of their Anglo-Danish foes, again from Forged in Battle. 
I need to decide whether I expand my 15mm collection or revert to 28mm and rebase all my skirmish based figures. I have far too many of both. 

We used dice to decide that I would lead the Saxons/Anglo-Danes and Ian and Nigel would lead the Vikings. Deploying across fairly open terrain we enjoyed using the Standard Deployment rules as we tried to counter each others opening moves. 

Deployment left the set up as in the photo above. Saxons across the bottom, Vikings above. 

The opening attack saw my scout cavalry destroy Ian's Viking thralls with bows but they themselves were destroyed by the Viking scouts then facing them.

Happily my Gebur with bows then shot enough of the Viking scouts to rout them. 

The two forces were edging warily towards each other. 
The red counters represent un-used orders tokens. These are a clever idea which allow you to try and interrupt the flow of play, hopefully to your advantage. 

Ian's Viking Hirdmen destroy my Thegns.

Look at the difference in casualties caused. 
There were some truly epic dice throwing going on from both sides. 

On the other flank Nigel's troops were involved in a desperate fight with some of my units. This was a real slogging match too with Nigel slowly gaining the advantage. 

Nigel enjoyed destroying a couple more of my units. 

My Thegn's managed to fight off Nigel's Hirdmen but it was too little too late. 
This was a really close fought battle with the Vikings claiming a close fought victory having caused just over 10% more casualties on me than I had on them. 

On Bloody Ground gave us another close fought game with a very exciting finish. We were quicker working our way through the rules today which added to the tension. 
Great fun, but I think I need to do more painting before we play again.  


Wednesday, May 24, 2023

'On Bloody Ground' Dark Age Wargames rules - a first game.

 This week we tried a small game of a new set of rules specifically aimed at the Norman Conquest era in Britain called 'On Bloody Ground' produced by 'WiP Games and Miniatures'. At just £15 I think this is a well produced set of rules (and certainly cheaper than say taking my family to the cinema, so good value).  Also my order was promptly delivered within a couple of days, that is good service. 

So, having read through the rules a couple of times what do I think of them. The shooting and combat mechanics are very similar to 'Warhammer Ancient Battles' of 'WAB' (which is one of my all time favourite sets of rules) but On Bloody Ground has been developed beyond this to give a very period specific flavour to your games. The rules are clearly written although you do need to jump about a bit sometimes to find that rule you know you have read but just can't find. Happily there is an extensive contents page and index to help you. The rules don't come with a fast play sheet but these are available to print off for free online. The 'Momentum' device used in combat seems quite an inventive way to help settle who won a melee and I also liked the extra Command Points available to your army so you can interrupt the flow of play to try and gain an advantage. I was a little worried that the game is a figure removal set of rules, especially as we were playing with 15mm multi-based figures but as the writers themselves suggest we used casualty markers which worked just fine. Finally, our 15mm figures all being based in 2 ranks meant we could not deploy in 3 ranks which some of the varying weapon choices allow. However this would be easy to work around if we decide to adopt this set of rules as one of our regular sets by painting up a few extra bases of single ranked figures. I do have quite a lot of 28mm Dark Age figures too but these are all based in a variety of ways, something I need to sort out and re-base. 'WiP Games and Miniatures' are also producing some short you tube videos to talk players through the various stages of the rules which I have found quite helpful.  


So, how do the rules play? We set up a small game of just over 1100 points or several units per side (2,000 to 2,500 is recommended for a typical army).  Happily I had also just painted up a 15mm set of Saxon Village buildings from Forged in Battle. I really do prefer the deeply etched detail of resin buildings over mdf and these ones are full of character. I would also like to get some of their Viking ships, buildings and perhaps even their Norman Motte and Bailey. 


It was randomly decided that Ian would take charge of the Vikings (top of the photo) and I would be in charge of  the Saxons facing them. 

We were using quite small forces so we deployed just outside bow range and as we were playing in 15mm we used half an inch to represent each inch of movement and shooting. There are a variety of deployment options in the rule book but we just kept it simple as only I had read the rules. 

Initiative and movement were quite straightforward and we were soon into the game. Ian won the initiative roll but opted to let me go first. I sent my mounted scouts forward and over the following three turns they got shot to pieces and wiped out. Ian also had a small unit of light cavalry which he sent on a flanking manoeuvre (as he nearly always does). Ian's cavalry finally arrived right in the last turn. 

Over on my right flank Ian's Thrall's were skirmishing very effectively in the woods. In the end I chose to ignore them and just went for his formed units. 

Here comes Ian's light cavalry heading for the rear of some of my formed units. 
You may have spotted that a few of the figures look like fantasy Barbarians - we had to use these to make up numbers to get a decent sized game.  

Huge clash about to happen on the left flank. Happily for me, most of my troops emerged victorious. 
The red gems were used as counters to indicate how many 'orders' each commander had left. These orders allow the characters that players control to interrupt play with an extra move, shoot, charge etc..., a game mechanic that we both took advantage of but you have to use them wisely as you only get a few. . 

Last action of the game (turn 6) saw my Saxon Mercenary units of Freebooters defeat Ian's Hirdmen and capture his King. I had already captured his Ulfhednar Character. With my brave troops having destroyed nearly 3x as many points worth of troops as Ian's and his King captured it was a clear victory to my brave boys.
The white counters are to indicate 'momentum' in melee and things were going my way. 
The numbered counters were our way of keeping score of casualties and that seemed to work well. 
So, having played a game what did we think of the rules. Movement, melee and shooting seem quite straightforward although we did struggle a little with actual combat results at first. We did have a few questions, even asking one of the authors mid game and were delighted to get a response with the answer just a few minutes later. Once I have absorbed the game a little more I shall ask David (one of the co-authors) a few more questions. 
Overall we both enjoyed the game and plan to play again next week, perhaps with slightly enlarged armies.    


Tuesday, May 16, 2023

More 15mm Hundred Years War

 Switching to play on Tuesday this week, Ian and Nigel were in command of the French once more, trying to wrest back some land from my English force during the Hundred Years War in a standard set piece battle. Using the usual Hail Caesar rules with armylists that we are slowly developing I had to deploy one of my divisions first, then Ian and Nigel and so on in that order until all divisions were deployed. It was around 330 points per side. 

French (Ian and Nigel) on the left, my English force is on the right.

Turn 2 and my first blunder as a whole infantry division withdrew from their defensive position.
(see their stakes at the top of the photo). 

Still turn 2 and my second blunder as the Earl of York and his cavalry force also withdraws, almost off the table edge.

Happily the Duke soon got his troops back under control. 

The French commander (riding an large ox) gets the peasants to clear away my skirmishing longbow. 

One almighty cavalry clash. The French won which then proved a real danger as they then swung around on my left flank... 

...and here they come...

...smashing into my poor longbowmen who got soundly beaten having failed to inflict and hits with their closing fire. 

There was also lots happening in the centre and the right flank but I don't seem to have any photo's. Poor Nigel was having very bad luck with his order throws (not that I minded too much)  and also got his troops tangled up with a small area of marsh/rough terrain. I managed to defeat and break one of his divisions but slowly the French closed in on my troops centre and left and broke my centre division leaving me with just one unbroken division left. 
So, a French victory but a hard fought game and great fun.  

Wednesday, May 10, 2023

Capture the Bridge

This weeks game was 15mm Medievals using our usual Hail Caesar rules and the armylists we are developing. Set during the Hundred Years war this was a fictitious battle based on the idea of an English force led by the Duke of York out on a Chevauchee and following a swollen river in search of a bridge. As they approach a bridge they discover that the French have also got there at the same time. Quickly deploying for battle, who can capture the bridge. 

Will my newly finished unit of knights and Commander, the Duke of York get death or glory in their first game? 

With the French (Ian and Nigel) taking the northern edge of the table the dice decided that I would deploy a division first but then won the dice throw to claim the first turn. 
English deployment. 

French deployment. 

Good throws during orders allowed me to advance to a good position on the central hill. 

The bridge that we were fighting over. 

Ian's main commander moved quickly to get over the bridge and threaten my flank.

Ian managed to chase away my skirmishers in the wood with his own skirmish unit who also managed to 'Break' one of my bombards.
 (the gap between the two units show where the bombard was). 

Overhead shot, Nigel's two units of Knights are bottom centre. 
Knights are really tough to get rid of. I got one unit of them to shaken but he was able to withdraw them and rally. 
 
On the far flank Ian's division failed their orders quite often yet still managed to break my hobilars with missile fire. My dice throwing on Break tests was truly awful. 

Nigel's leading unit of French knights managed to defeat my nice newly painted knights in melee and Break them too as I threw a total of 3 on my Break Test.  
(the curse of the newly painted units?). 

Back near the bridge Ian's Men at Arms and mine clashed. I managed to fight him off and wound his Army General (the 5 and 6 on the red dice). 

A final overhead photo as we had to finish the game just as several units on both sides were looking quite battered (shaken and even dis-ordered). I am not sure if it was the nature of the scenario or did we just take too many turns getting into a good position before the main fight started? We called it a really hard fought battle and a draw as there was no clear winner. 


Wednesday, May 3, 2023

Bolt Action: Fox killed in the Open, 1941

Before we played our game today we took time to discuss the very sad passing last week of our good friend and fellow gamer Phil. Phil was always a cheerful and bubbly character, good for a laugh and a canny tabletop general. He will be sadly missed from our games. 

 Once again we adapted a scenario from the Western Desert Bolt Action book, substituting my Afrika Korps for the Italians in the 'Fox Killed in the Open' scenario. Playing length ways across the table the Afrika Korps had to break through the British forces and overrun the British HQ. There was a wadi across the middle of the table and we used a small building rather than a tent for the British HQ. 

The table was split into thirds running along the table. Ian had to deploy half his troops in the far third by the building which was his HQ (the main German objective). The other half of his troops were deployed in the central third with Ian making good use of the cover provided by the wadi. His deployment of his Matilda on one flank and the Churchill on the other proved to be a game winner. Both proved to be too tough for the Germans to get past. 

Next came the German pre game bombardment which was not too successful, you can see the few 'pins' scored from this on the photo below. Then the German advance started at the opposite end. 


The next photo shows Ian's Matilda snug behind the cover provided by the Wadi. Ian also made very good use of the 'Ambush' order during this game. 


Nigel took a difficult shot at the Matilda, needing a six to hit followed by another 6 and amazingly he scored the two 6's. Sadly his throw to penetrate failed. 


My Armoured Car ventured into the sights of the Churchill with devastating effect. 
(good shooting from Ian). 


With the Afrika Korps struggling, they had very little that could damage the Churchill so it started a slow advance across the Wadi getting around the flank of the central German troops.  
The German half track did not last long. 


The German centre was getting a little crowded as everyone tried to use what little cover there was. In fact no German troops made it further than the Wadi. 
Nigel was using the mortar to lay down plenty of smoke, which seemed to hinder us as much as the British. 


The Churchill destroyed the half track and then went after the few infantry that had survived the hit on their half track. 


Nigel had the Pz111 still firing at the Matilda and immobilised it and then enjoyed using the tanks MMG on the British infantry which were doing a cheeky advance.  


I tried to get our HQ forward in the kubelwagen but they soon came under fire. 


Then the Churchill took out the Pz111 with it's first shot at it. 
This proved to be the last main action of the game. 
With the Germans failing to get beyond the wadi and only getting six units to the wadi they scored just six victory points. The British scored two points for each German unit they had destroyed scoring 10 points to achieve a clear victory. 

Another fun game and with all three of us now having the rules we are gaining a better understanding of the rules and look forward to more games both in the desert and in other theatres.   


Trying 'General D'Armee' v2 in 15mm

  Howard, Ian and Nigel have been playing a few games of the new version of 'General D'Armee' and this week I was able to go alo...