Tuesday, July 29, 2025

The Battle of Hastings in 28mm using the Hail Caesar rules.

 The campaigns and battles of 1066 and the few years after have long fascinated me. At long last I finally got round to re-fighting the main battle of that time, Hastings. Using figures from my own collection and those of Ian and Charlie as well four of us sat down to play the game. I re-read a few accounts of the battle and planned a scenario with some of the events that happened that day mixed in to hopefully give the players a few surprises. I have only listed stats for the troop types used during the game. I have called the Normans...Normans but have called the Anglo-Danes... Anglo Saxons. This is the book I used mainly for troop numbers and deployment etc.. as a bit of a nod to a great wargames 'name'. 

Here are the scenario details, including army lists, deployment (see map) and special events ...

With both sides estimated at around 7,000 to 7,500 men I have used a very rough guide of 1 figure is equal to 30 actual men, but have also rounded numbers up to make complete Hail Caesar units. 


Hastings: Umpire notes… only reveal to the relevant players after deployment.


All Norman cavalry that may use Feigned Flight may also turn to face upon executing their flee move (whether this was a single move from Initiative of up to 3 moves on a successful order). 


The marshy, rough ground on either side of Senlac hill is only placed by the Umpire after Norman deployment. Any troops other than skirmish infantry moving through this ground will become disordered. 


Last Man standing: whilst Harold is still alive his personal unit of Huscarles will never break

They may withdraw, taking Harold with them but never break until destroyed. 

Map of deployment, the Saxons deploy first but the Normans take the first turn. 

William pondering tactics before the battle.

Hastings 1066: Normans. The Normans are the attackers and take the first turn. 


INFANTRY

Unit

Clash

Sustained

Short

Range

Long 

Range

Morale

Stamina

Special

Points

Hvy Spearmen

7

7

3

0

4+

6

Heavy Infantry

26

Med Spearmen

6

6

3

0

5+

6

Medium Infantry

23

Inf bow or x-bow

5

5

3

3

5+

6

Medium Infantry

24

Skirmish bow or x-bow

2

2

2

2

0

4

Skirmishers

Small Unit

12

CAVALRY

Unit

Clash

Sustained

Short

Range

Long 

Range

Morale

Stamina

Special

Points

Knights lance

9

6

3/0

0

4+

6

Tough Fighters

34

0-1 Knights with Fr. Charge

9

6

3/0

0

4+

6

Tough Fighters and Frenzied Charge

37

Breton Knights

9

6

3

0

4+

6

Spear/javelins

30

Light Cavalry

5

3

2

0

6+

4

Small Units

17


SHIELDWALL: Takes a whole move stationary to form a Shieldwall, but may come out of Shieldwall without penalty. Units in Shieldwall move at half speed, deduct 1 from their combat values, add 1 to a morale roll, add 1 to any Break Test resulting from melee.  

(All Heavy and Medium infantry may form Shieldwall).


Frenzied Charge:must Charge if in range, three moves allowed on a successful order/initiative.

Tough Fighters: re-roll one missed combat attack.  


Tallifer: before the battle commences a lone Norman knight advances from the Norman line to challenge any Saxon Huscarl to a duel. This is the minstrel Tallifer. The Saxons will send a hero out to meet the challenge. Both players throw 1xd6, the highest score wins the duel. If Talifer dies the huscarl returns to the saxon ranks and the battle commences. If Tallifer wins the duel he then charges the saxon ranks. Once again, both players throw a d6. If Tallifer loses the battle will now commence. If Talifer wins, he meets an heroic death but does manage to inflict 1 point of damage on the Saxon unit he charged. 


Rumour of William's Death: At the start of each Norman turn, the Duke William must throw 1xd6. On a score of 6 a rumour runs through his ranks that he has fallen. For this turn all units in William’s division may not advance or charge. They may however shoot and may defend themselves if attacked. 


Papal Banner: William was gifted this banner by the Pope. Once per turn William may re-throw one failed Break test for any one unit in his division. 


Duke Williams division.

William the Bastard: Ld:9, FV:3, leads his own unit of Norman Knights with Ferocious Charge plus the Papal Banner.

2x Units of Norman Knights, lance.

2x units of Heavy Infantry with spear 

1x units of crossbow

1x units of skirmishers with crossbow 


Bretons Division.   All mounted units in this division have the ‘Feigned Flight’ rule which allows them to break off from hand to hand combat by using Initiative or an order. P157.  

led by Alan Fergant, Ld: 8, FV: 2. Leads his own unit of Breton Knights with javelin.

1x unit of Breton Knights, javelin.  

2x small units of light cavalry with javelins.

2x units of Medium Infantry Spear. 

1x unit of bowmen

1x unit of skirmishers with bow


Flemish Division.

 led by William Fitzosbern and Eustace of Boulogne. Ld:8, FV: 2, lead their own unit of Norman Knights with lance. 

2x units of Norman Knights, lance

2x units of Medium Infantry with spear.  

1x unit of skirmishers with bow. 


Harold, taking a quick rest before the battle. 


Hastings 1066: Anglo Saxons. Must deploy first. 


INFANTRY

Unit

Clash

Sustained

Short

Range

Long 

Range

Morale

Stamina

Special

Points

Huscarls

Hvy Inf, Long Spear    or

armed with 2-H axes

7


8

7


7

3


2

0


0

4+


4+

6


6

Tough Fighters, Elite, Stubborn, Valiant

Shieldwall

No Shieldwall

36


37

Thegn Heavy infantry: spears

7

7

3


0

4+

6

Shieldwall

long spears, phalanx

32

Fyrd  medium Infantry: spears

6

6

3

0

5+

6

Shieldwall

23

Militia

7

7

2

0

6+

8

Militia, large unit

Freshly raised. 

22


Skirmishers with javelin

3

2

2

0

0

4

Small unit

11

Skirmishers with bows

2

2

2

2

6+

4

Small unit

13


SHIELDWALL: Takes a whole move stationary to form a Shieldwall, but may come out of Shieldwall without penalty. Units in Shieldwall move at half speed, deduct 1 from their combat values, add 1 to a morale roll, add 1 to any Break Test resulting from melee.  

Elite: recover from Disorder on a 4+                             Stubborn: re-roll failed Morale Save

Tough Fighters: re-roll one missed combat attack.     Valiant: Break Test re-roll once per battle

Wavering: take a break test when you take a casualty. 

Militia: no move on roll equal to Leadership. 

Freshly Raised: check unit in its first round of combat. Throw 1xd6, 1: Terror, only hits on 6’s and becomes disordered, 2-3: Panic, in its first round of combat hits on 6’s only, 4-5: Determined: unit does its duty, 6: Inspired: unit gets an extra attack in 1st round. 


Fighting Man Banner: this is Harold’s personal standard. Harold’s own unit of Huscarls may re-roll failed Morale Saves once every turn. 


Fyrd re-enforcements: (may only happen a maximum of 3 times. 

At the start of each of their turns, the Saxon Commander must throw a d6. On a score of 6 an extra unit of Fyrd enters the board along the London Road. The Anglo Saxon player may decide which division the new Fyrd unit moves to join. 


One in the Eye: At the end of each turn the Saxon commander throws 2xd6. On a score of double six, one randomly selected command figure may have been injured/killed by an arrow in the eye. Randomly select any leader figure from either side whose division has been targeted this turn and throw for missile damage as usual. 


Harold Godwinson, Ld: 9, FV: 3 plus his Fighting man Banner. Leads his own unit of Huscarls.

1x unit of Huscarls

2x units of Thegns

2x units of Fyrd

1x unit of skirmishers with bow


Leofwine: Ld: 8, FV: 2 leads his own unit of Huscarls

1x unit of Huscarls

2x units of Thegns

2x units of Fyrd

1x Militia unit: large unit. 

1x unit of skirmishers with bow


Gyrth: Ld: 8, FV: 2 leads his own unit of Huscarls

1x unit of Huscarls

2x units of Thegns

2x units of Fyrd

1x unit of skirmishers with javelin


Charlie and Nigel took control of the Normans leaving Ian to play the role of Harold Godwinson and also Leofwyn whilst I controlled Gyrth's division and tried to remember all the special rules.

King Harold and William the Bastard have a friendly chat before the battle. 

The Normans are eager to get going. 

Overview of deployment. 

Tallifer rides forth and after two rounds slays a Saxon champion. 
Tallifer then charged the Saxon line but was cut down with no effect. 

The Normans now advance, apart from Charlie's knights on the Norman right who decided to withdraw???

The Saxons feeling confident on their hill. 

King Harold surveys the battle just before the two sides clash. 

William stays back, watching the battle unfold. 
He had sent his two flanking divisions forward, holding his own troops back apart from the missile troops. 

The Norman light cavalry attack the Saxon skirmishers in the rough ground and disperse them.

The Norman shooting had been causing quite a lot of damage to the Saxon Shield wall, it was time to send in the knights, and they were very tough!

Many warriors were slain on both sides. 

After much heavy fighting Harold's brother Gyrth was slain, his division then broke and the Saxon left flank was open. With Charlie also doing well with the Breton division on the other flank, forcing their way on the hill and Leofwine's units being destroyed and pushed back the battle was going the Norman's way when we had to call time. Another tow or three turns would certainly have seen a Norman victory with just Harold left isolated in the centre of the hill virtually surrounded by Normans. 

We all really enjoyed the game, Hail Caesar certainly gives fast, fun games. We also learnt a few things. If we were to play this scenario again we would probably limit the number of rounds of shooting for the Normans; afterall they did run out of missiles in the actual battle. We also learnt that Norman Knights are tough, even when you are a unit of Saxons in shieldwall, well supported and in shieldwall! When Nigel though 9 melee dice and two dice for hus leader and scored 11 hits I knew I was in for a tough day. Only one extra unit of Saxon Fyrd managed to arrive and that was the only special rule that the dice managed to trigger so in a refight I perhaps need to make them a touch easier to happen.


Tuesday, July 15, 2025

Pillage: trying the new Early Middle Ages skirmish game from Victrix.

 'Pillage' is the new Early Medieval/Viking Age set of skirmish wargame rules from Victrix, translated from the original French version written by Guillame Rouselot. Having had a couple of read throughs I like what I see; this should be a fast fun game set in one of my favourite eras. My initial thoughts before actually playing the game are the rules seem heavily inspired by the 'Middle Earth Battle Strategy Game' (which is fun) but tweaked and developed into something new. The searching or 'pillaging' for loot is certainly well within the games theme but is also reminiscent of games such as Mordheim and Frostgrave. 

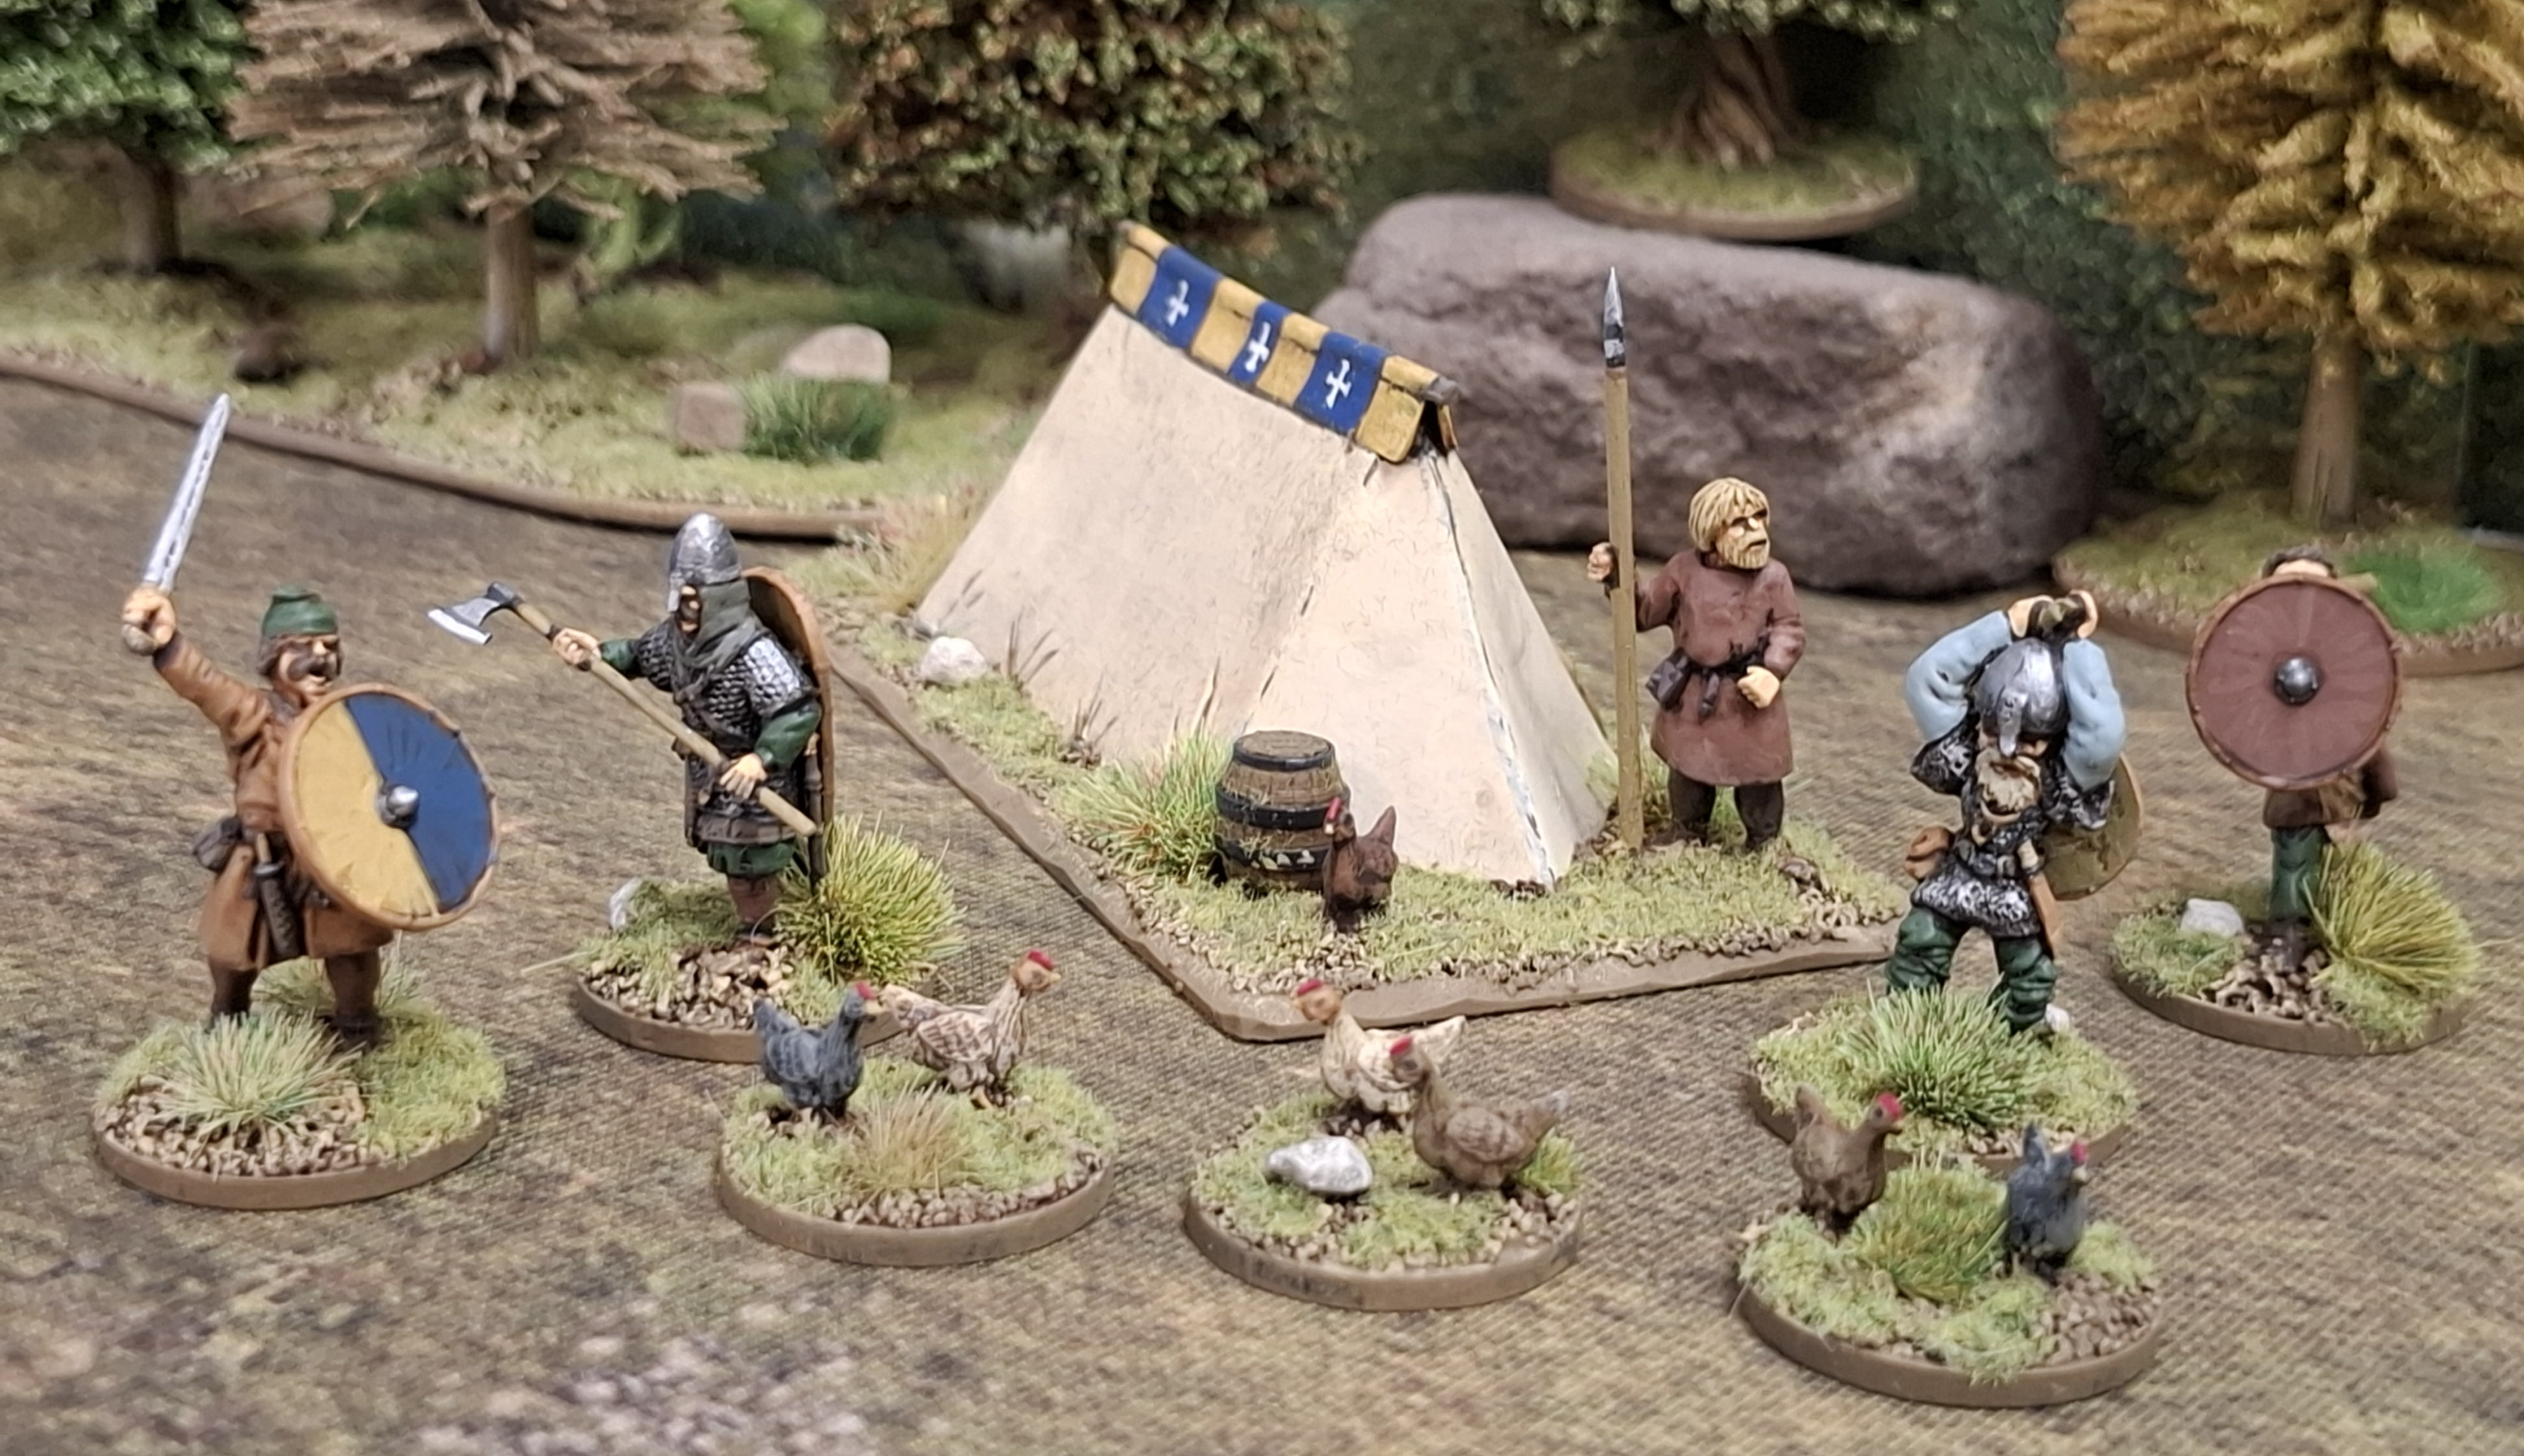
"Looks like chicken for dinner tonight!" 

The book itself is beautifully presented and a joy to read. The author has obviously created a work of love and his interest and enthusiasm shine on every page. The book is full of photos of his own very well painted figures and lovingly created terrain. Guillame has also done some of the illustrations along with Leslie Bigo. There has been a bit of fuss online about some of the images that illustrate the book having been created by using AI. Apparently in the French version of the book this has been credited whereas in the English version it is not. Victrix have acted quickly on this by apologising for the oversight and by saying this will be corrected and credited in any future printing of the book. I am not too sure where I stand on the use of AI as I am largely uninformed about it but if the author has used AI to create unique work that does not infringe other artists intellectual property then I am OK with that and with Victrix now adding a short note to say that AI has been used in their creation it all works for me. 

"Oi! Those are my chickens!"

 I have been busy painting up a few more single based figures and loot tokens such as pigs, chickens and barrels to try and get ready for our first game.  Note that we will be using a variety of figures, not just Normans and Anglo Saxons but a few Vikings and Irish too. This is all we have just now but we will work at painting up some more.  

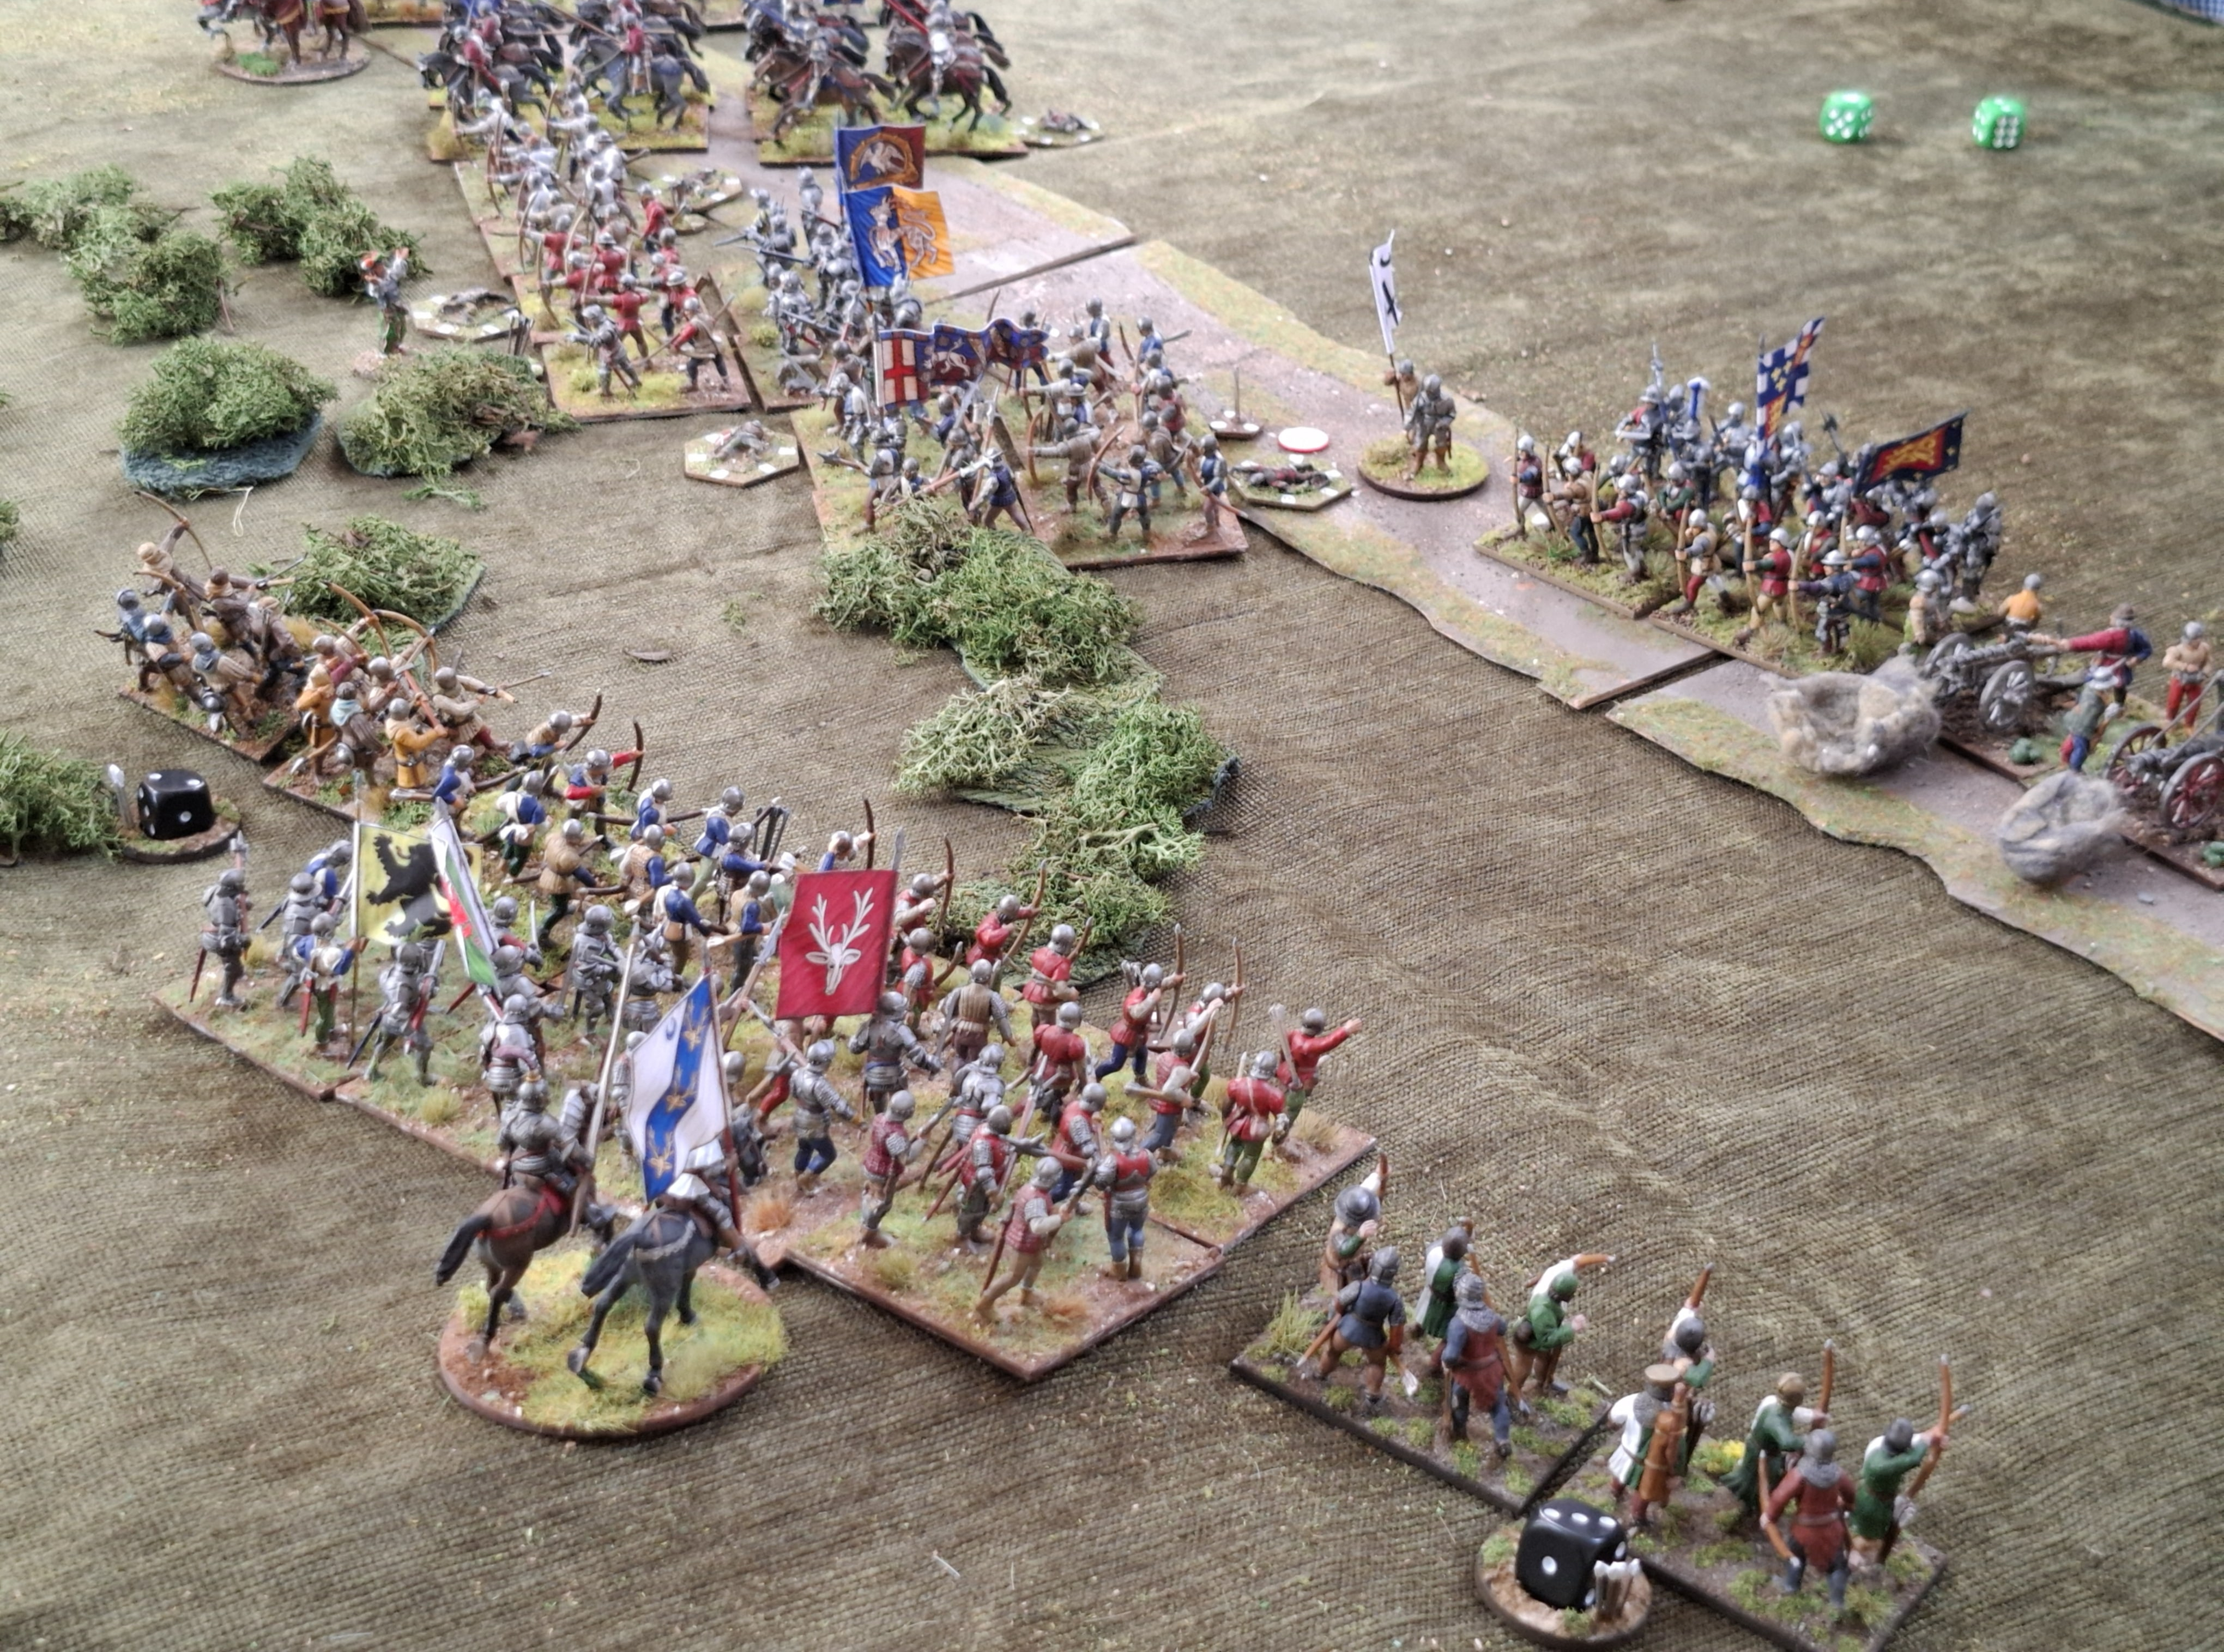
For our first game I chose the 'Pillage' scenario and enjoyed using my various huts and other pieces of terrain (and some pieces from Ian too) to set up a suitable table as indicated in the book. I was in charge of the Anglo-Saxon defenders whilst Ian and Nigel were in control of the attackers, an allied force of Normans with a few Anglo Saxons. My idea being that the defenders are rebel Saxons in 1069 with the Normans getting help from a few Anglo Saxon sympathisers. 

So onto the game, how did we get on?   

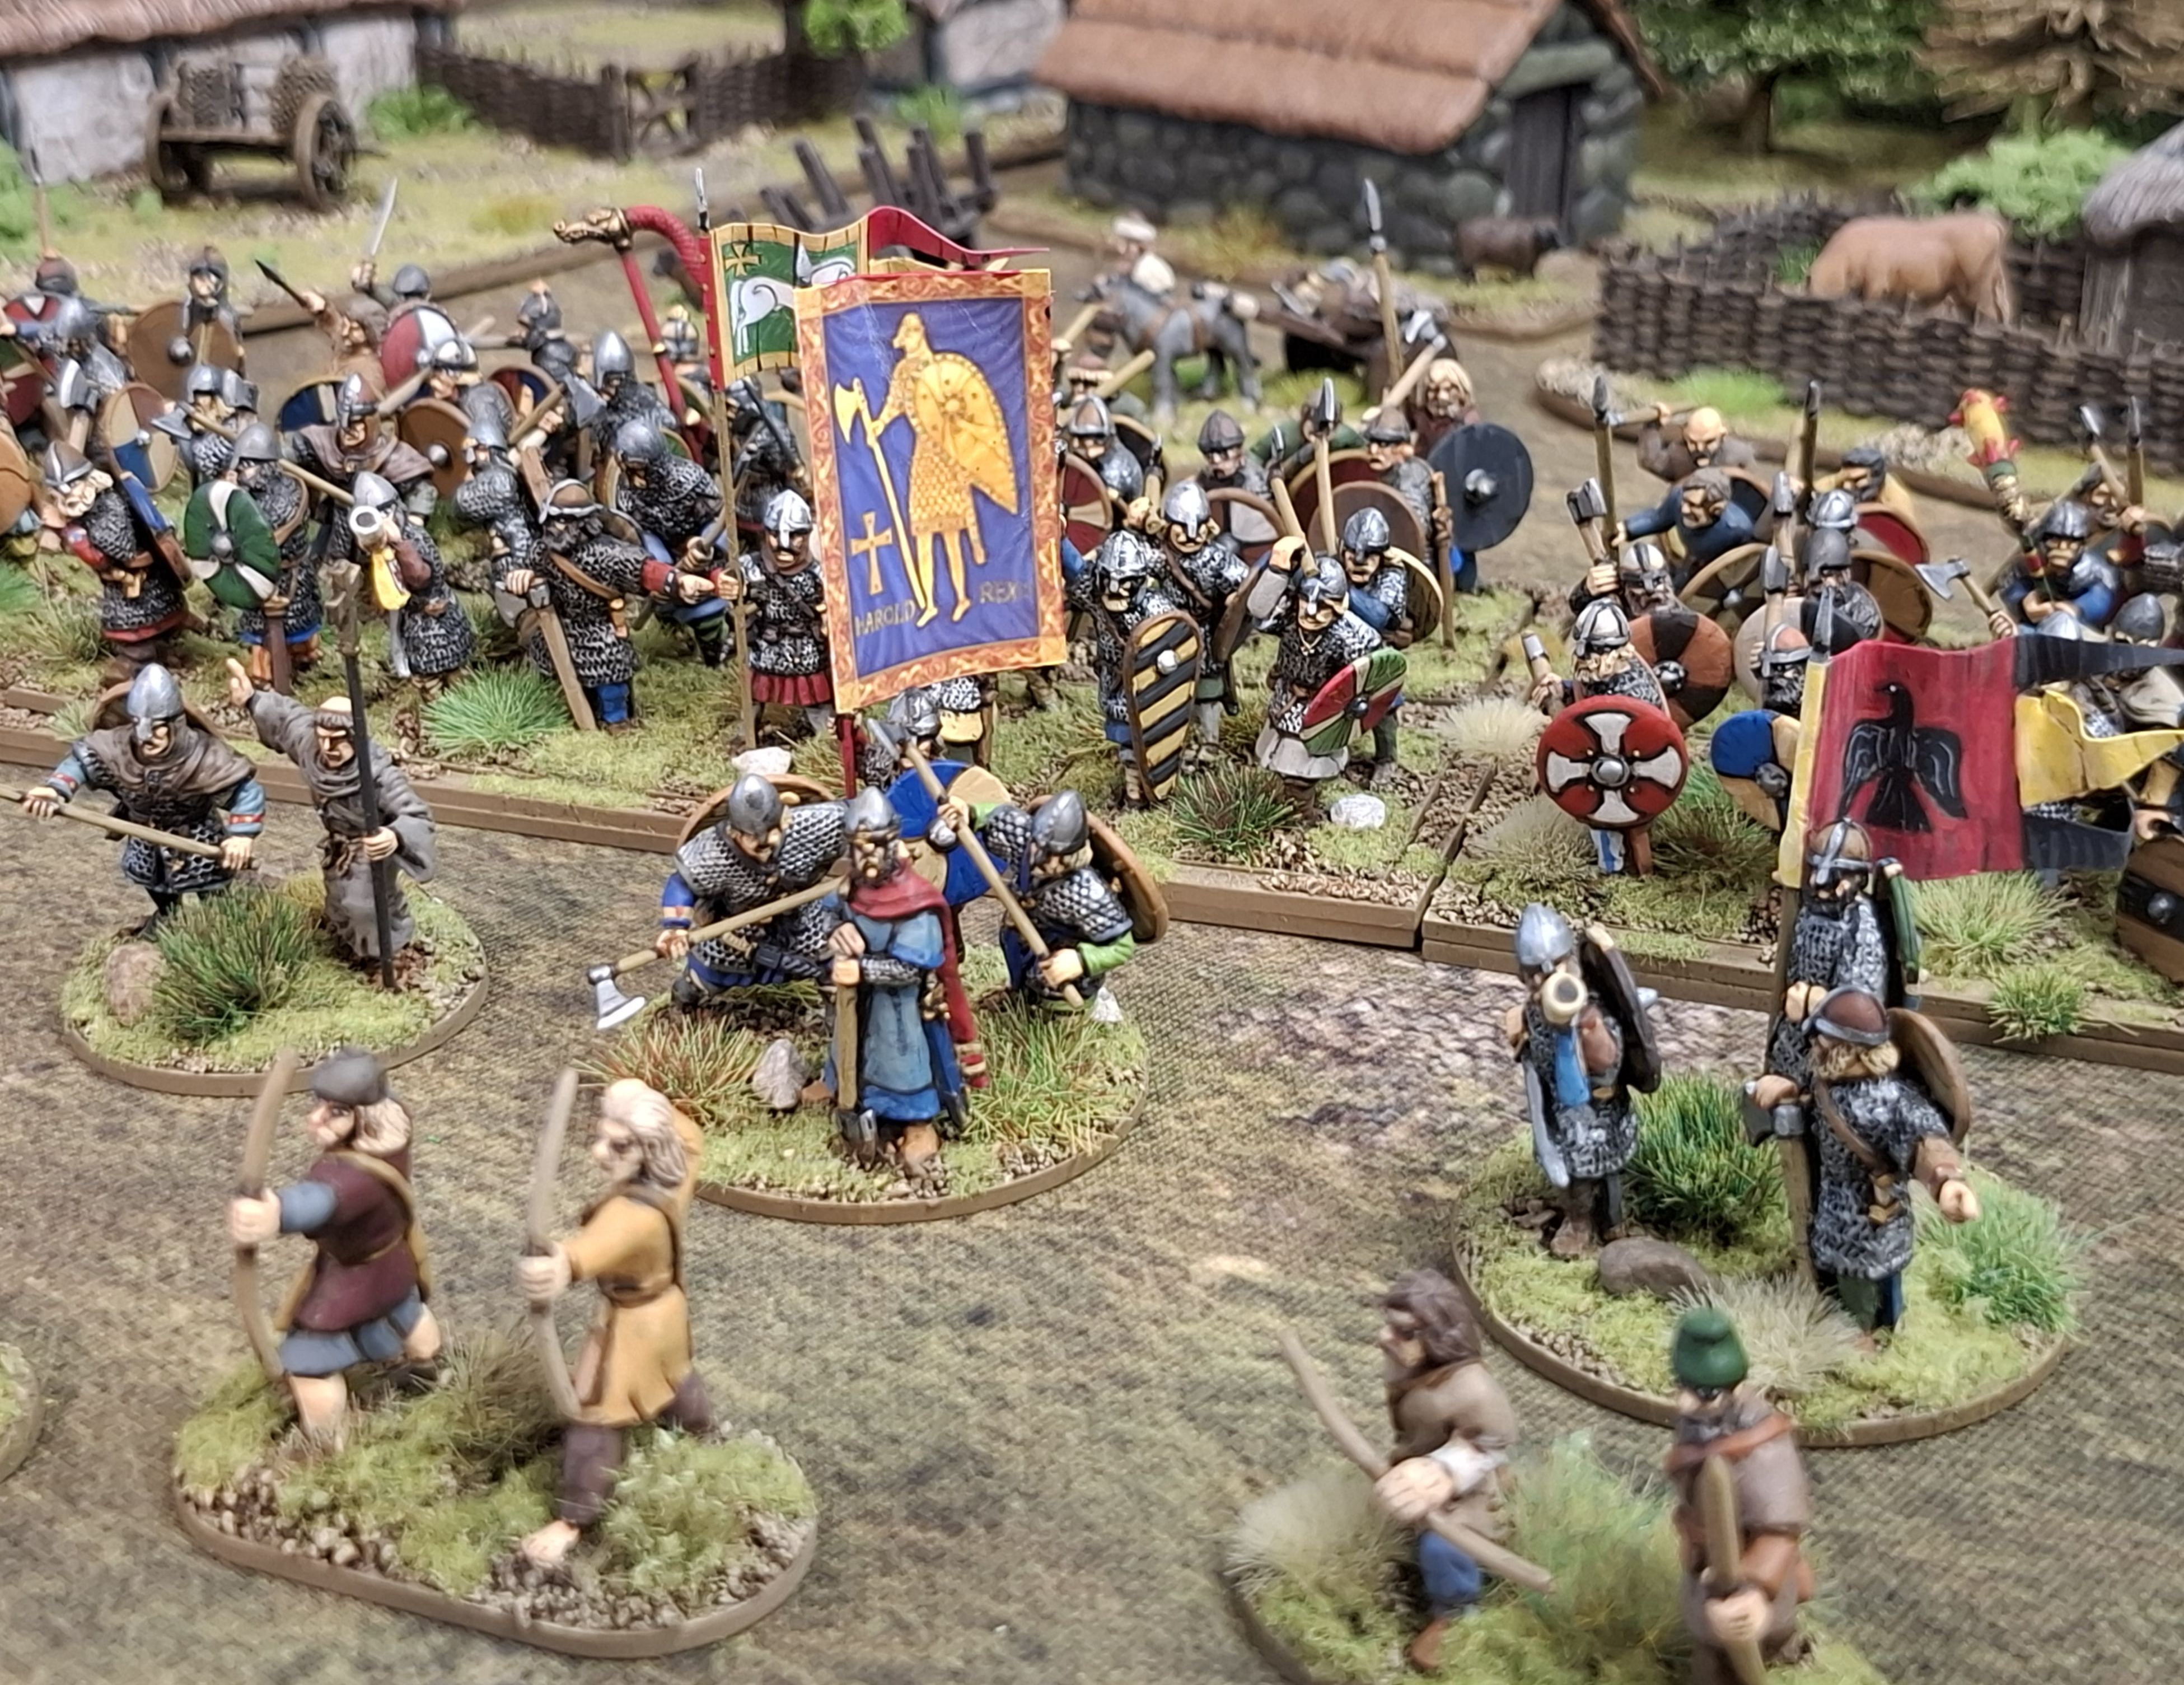
I chose a healer priest to help my Anglo Saxons, deployed him by his chapel and Ian promptly charged him with his one cavalry figure. The priest did very well by surviving for 2 rounds of combat before being killed. (So I didn't get to find out how effective a healer can be). The Saxon cavalry man was later killed as he entered the north side of the village. 

The villagers remain at peace, not yet spotting the approaching Normans at the top of the photo. The Norman archer shot the poor peasant at the top end of the village. 
We were soon to find out how deadly archery could be. 

My Anglo Saxons took up positions in the village centre. Nigel's nasty Norman archer shot one of my poor archers before he had a chance to get off even one arrow. Nigel's missile fire was quite deadly whereas mine was quite ineffective. 

Ian's Saxon huscarl led his men on a flanking action around the side of the village searching for lot and trying to set fire to the buildings. 

One of Ian's men having set fire to one building, grabbed a torch and went of on a pyromaniac style romp all round the west side of the village 

Here is 'Pyro' in action. 
My poor Anglo Saxons were in real trouble by now, down to half strength and two further figures fleeing from bad Morale left me in real trouble as the Normans and their allies began to grab the loot and set the much of the village on fire. 

In a last gasp desperate action my Chieftain (figure on the right) attacked Nigel's Norman chieftain  (centre) helped by the last two of my warriors. 

The Norman chieftain was boosted by his 'talent' that allowed him one extra hit point, putting him on 4 . Sadly I only managed to wound him 3 times and in return he had not managed to damage my chieftain at all. The Normans and Saxon allies even survived their morale test without losing any extra figures. 


'Pyro' was still setting fire to all the buildings he could reach. 
The end of the last of 10 turns saw the Norman chieftain survive plus half of his men. With only my chieftain left alive we decided he would run off to fight another day. The Normans had amassed 9 loot so victory was awarded to them. 

Pillage was great fun to play. My photos do not tell of my cowardly saxon warrior who refused to charge every time he was asked to do so. Nor do we see my unarmoured warrior with a dane axe who kept charging and took out two enemy warriors before being killed. These 'cinematic' moments are what bring the game to life with much laughter and also a few moans and groans when the dice let you down. All three of us really enjoyed the game and look forward to playing again, perhaps trying out a Viking faction next time? The game is easy to pick up and so flows well. We got a couple of things wrong during the game but I soon found out what we had done wrong on a quick check in the rules. 

One of the things I like about the rules is it's use of the good old d6 and no fancy tokens or cards etc...so common with many rules recently. Another positive is the simplicity of army/force selection. With force selection being a quick purchase of the equipment each figure actually possesses (WYSIWYG) and a talent or two for your Chieftains.  Agree a points total with your opponent and away you go. We played at around 450pts per side which gave 13 and 14 figures per side. Games or around 10 to 30 figures per side could easily be played in one gaming session. If my memory serves me right I recall mention of a 'campaign' system book and this can only add to the fun. 


Tuesday, July 8, 2025

The Battle of Bosworth 1485, using Hail Caesar.

 Charlie very kindly hosted a game of Hail Caesar for Ian and I today. Charlie had created a scenario based on the Battle of Bosworth in 1485. He mainly used the scenario from the Wars of the Roses HC book but with a few tweaks of his own. Loyalties decreed that I command the Lancastrians whilst Ian took control of the Yorkists. Charlie, having devised an activation system for Northumberland and the Stanleys would control those forces if they decided to enter the fray.

The French captains (Philibert de Chandee) troops held their ground as the men of Norfolk advanced losing their arrowstorm. 

Richard 3rd held himself and all his cavalry back initially.

The view from behind the Lancastrian line, note the marshy ground in the centre that impeded troop movement. 

Looking along the table, from behind Chandee's division. Note Richard 3rd's cavalry starting to advance in the centre. 

The first main casualties caused a Yorkist Household unit to break. The Lancastrian archery was proving to be superior (luckier?) than the Yorkists, especially when they throw a 4 on their Break Test. 

Here comes Richard!

Sir William Stanley chose this moment to advance his division and did so quite rapidly and straight into action against Brackenbury's troops.  

A couple of turns later Baron Stanley himself chose to advance. Northumberland waited until the last couple of turns before he chose to move but then failed his order tests two turns in a row so took no part in the battle!

With most longbow units arrow supplies used up it was time for melee. 
Most of the melee's were won by the Lancastrians so things were looking bleak for the Yorkists. 

In a desperate attempt to get through to Henry Tudor (hiding at the back) Richard 3rd led his cavalry in a reckless charge but lost his life fighting some household troops from Oxford's division...game over!

This was a large game using figures from all of our collections. Charlie hosted the game very well and Ian's desperate attempt to get Richard 3rd into melee with Henry Tudor was very cinematic and certainly echoed history. We all had great fun and enjoyed such a large game on a roughly 10ft by 5ft table. We are now looking at which large historical battle we can do next. 


Sunday, July 6, 2025

28mm Anglo Danes

 I am quite pleased with the current progress of my 28mm Anglo Danish army and the various buildings, wagons and villagers to go with it. This army was started in 2000 when I bought a mixed boxed set of 50 'Dark Age' figures from Wargames Foundry. Originally they were painted up for skirmish games but a couple of years ago I decided to rebase everything for Hail Caesar to use in bigger battles. I have also managed a few games of Early Medieval themed Lion Rampant too. There are now figures from Foundry, Victrix, Gripping Beast, Crusader Miniatures and a few others in the army.

The main problem is that you need a lot of figures to make up a decent sized army for HC and I had Normans, Vikings, Picts, Arthurian British and Early Saxons to expand as well as my Anglo Danish thus progress has been slow as I flitter about between the various armies and of course my many other projects. To make life easier I decided to concentrate on my Normans, Vikings and Anglo Danes first plus all the extra bits and pieces that help a wargames table come alive. I did a post about my (almost complete) Normans a while ago but today I decided to look at where I am up to with my Anglo Danish army led of course by Harold Godwinson. 

Latest unit of levy infantry, mainly GB plastics with a few bits from other makes. 

Also going full circle, I am now painting up a few single based figures for use with the recently released 'Pillage' rules from Victrix. I have just finished reading through the rules and they look like they will give us some great games. They seem to be a blend of Middle Earth Battle Strategy rules and a few bits from games like Mordheim and Frostgrave for the 'pillaging'. 
I will slowly be adding more single figures and livestock such as the chickens I painted this weekend. 
The tent is a plastic model from Renedra and I have 3 more of these to paint. They wil make an impressive camp in large battles and a good place to 'pillage' in skirmish games. 


My village so far, complete with small chapel, wagons and a few villagers. 

In games of Hail caesar the village will probably mainly feature to the side or rear of the main action whereas in Pillage the village will likely be the centerpiece of the game. 

I also have 5 bases of villagers escorting various livestock which will be very useful as loot as wil the wagons. 

A few 'shieldwall' markers and casualties, all very useful. 

Thor, my turn counter, posing with a few friends to show how big and tough he is. 

The Anglo Danish Hail caesar army so far, two full divisions of infantry (8x units of 16 figures) and two units of skirmishers with bow. There are also 4 command bases. I need to paint up at least 4 more infantry units to create the third division that I need. 

A view along the shieldwall. 

Harold Godwinson and his brothers, ready to lead the army to victory. 

Some skirmishers sent out to annoy the enemy. 

The battles and campaigns of 1066 have always been one of my favourite era's of history to read about and study. I am slowly working on a large Hastings scenario which we should be able to play before too long with the help of some of my friends and the suitable figures in their collections. First though, I fancy a few games of Pillage!


Tuesday, July 1, 2025

Rapid Fire 15mm Blitzkrieg.

 Ian (German), Nigel (French) and myself (British) have been quietly painting some 15mm forces for Early War Rapid Fire. Today was the day to get some of them on the table for the first time. We used the Cassel - The Citadel scenario from the Blitzkrieg Battlegames book but used our own forces that were based on different battlegroups. The larger German force had to try and take a well defended hill town from the British. As Nigel had painted up a few French, we put them out on the British right flank to hold the villages of Zuytpeene and Bavinchove. 

My 25pdrs were deployed to the left of Cassel - they didn't hit a thing all game right up to the last turn when they did destroy a german artillery piece. 

The British infantry were mainly deployed inside the houses of Cassel. 

Nigel also deployed his French infantry mainly in the two villages houses. Ian's rapidly advancing German infantry soon overwhelmed the French forcing them to fall back.
Note here that all buildings were counted as intact at the start of the game but we used some ruins in some places as that is all we had. 

Ian sent on some motor bike riders first and Nigel promptly shot some of them. 

Ian's main German advance, heading straight for Cassel.

Turn 1 and my Matilda and my 25mm AT gun had some fun with the German tanks. 

When Ian later deployed some german AT guns I sent my Matilda 1's on a mission to destroy them. Just behind them my 25mm AT gun had just been hit by HE killing the crew but not harming the gun which I later re-crewed. 

Most of Ian's German tanks could not harm my Matilda's and they could not damage them in return so the two forces moved past each other on their separate missions. 

After destroying or damaging quite a few German tanks my poor old Matilda II, after absorbing so many shots at it got finally got destroyed. 

It took all game but Ian's Stuka finally arrived and took out one of my 25pdr's. 
My solitary AA infantry stand failed miserably in it's attempt to fire back.

As our gaming time was coming to an end, Nigel's French who had been slowly whittled down by the Germans became surrounded, failed their Morale test and thus surrendered. Ian's German forces had been so badly damaged that he felt he had little chance of taking Caessel,thus an Allied Victory was declared. 
Another great game of Rapid Fire and our first in the Early War setting. We learned quite a lot about the abilities (or lack of) of our varying troop types. We are all looking forward to playing again. 


15mm Fantastic Battles: Wylde Elves v Dingly Dell: Serenity

  Back to Fantastic Battles this week and our third game in a loosely linked series of games. This time Ian created the scenario and I was i...